What’s Coming Up Next? Tomato Software Introducing Desk Shots 5 for macOS

Mac Desk Shots 5

YOKOHAMA (Señor Tomato) – Oh, boy… It doesn’t stop raining. We had a brief break two days ago. Today, it continues to rain. I don’t know when I will be able to go out jogging. It looks like we have a new typhoon approaching the Tokyo-Yokohama area.

Well, since I cannot go outside, I’ve been busy writing code for a new desktop application. And I just submitted it to Mac App Store a few minutes ago. This new release is called Desk Shots 5.

The Screenshot application by Apple has been around for some time. It’s very useful if you want to take desktop screenshots. You know, you can take a screenshot for the entire desktop area or a partial area that you define. There are several aspects that make it difficult for us to use it, though. For example, the Screenshot application tells you of the size of the rectangular region but not of its position. You can’t tell whether or not the rectangular region covers the menu bar. Also, you can only define one rectangular area at a time. Some people may not like the idea that you cannot set the base file name apart from ‘Screenshot.’

So here comes Desk Shots 5, the latest version of the 13-year-old desktop application, which started as one that allowed the user to take screenshots of a partial desktop area. Desk Shots 5 now lets you automatically overlay text, circle, rectangle and symbol (SF Symbol) objects over screenshots. Desk Shots 5 isn’t just a screenshot application any more. This version also lets you record a video over a partial desktop area you define.

Desk Shots 5 comes with a status menu. By switching to the menu bar mode, you can take a screenshot or start recording a video from the menu bar commend.

Desk Shots 5 fully supports the Undo/Redo stack. So whether you move a layer from Point A to Point B or change its foreground color, you can undo the last action by choosing Undo under Edit.

In order to define a partial desktop area, all you have to do is use a floating color window, which you can move with your mouse pointer. Then click on the Save button to name this Window Asset. If you want to take a screenshot or record a video, select one of the Window Assets to define a partial desktop area.   Continue reading

What’s Coming Up Next? Tomato Software Introducing 2nd Launcher for macOS

Mac 2nd Launcher

YOKOHAMA (Señor Tomato) – The rainy season is definitely back because it rains every day this September. Yesterday, I was caught in heavy rain on my way to a grocery store.

Well, we had two iOS apps in a row earlier. My main focus is always on desktop applications. So here we go. The latest software release to introduced to you today is called 2nd Launcher.

Every macOS user must be thinking that the Dock is very useful in listing dozens and then launching a specific one. One big problem that I always have is that the Dock is so crowded that I have trouble finding a specific one that I need to launch. When the Dock is very crowded, each application will become very tiny.

2nd Launcher lets you manage and organize desktop applications by enlisting them over 50 pages. You can highlight an important application with one of a dozen colors. Additionally, you have options of launching or not launching each application when this application starts up.

2nd Launcher comes with a menu bar icon. When you click on its icon, it will show a list of desktop applications you can launch over 50 pages. You can click on the left and right button to switch pages. If you have given an application a level of importance in color, the application name is highlighted here accordingly.   Continue reading

What’s Coming Up Next? Tomato Software Introducing Nopac Desktop for macOS

Mac Nopac Desktop

YOKOHAMA (Señor Tomato) – The second software release of this month is Nopac Desktop.

Nopac Desktop and its iOS counterpart Nopac Mobile are designed for college students who use their iPads and Macs to regularly take notes during lectures and then review their notes on their devices. Nopac Desktop and Nopac Mobile have basic writing style features such as bolding, italicizing, underlining, colorizing a text segment. They also support the Undo/Redo stack such that you can click on the Undo button to undo the last text style change.

Nopac Desktop isn’t just a simple word processor for your desktop computers. When you register a course, you can create a list of keywords so that you can click on one to insert the selected keyword to the note document. Additionally, you can attach one or more photos to each document by clicking on the Add Image button.

Whether you take lecture notes on your iPad or Mac, you can easily share data course data between them. Sharing data between devices cannot be any easier than just with the click of a button since it doesn’t involve a special account for it. Just make sure that they are on the same iCloud account. If you want to share course data, select a course record on the right pane at the Startup screen. Then click on the Push button. On the other hand, if you want to view and edit a course record that you created on your iPad or another Mac, just click on the Fetch button.

With the click of a button, you can export selected lecture notes as a PDF file or an RTF file. The export options are available in the Settings sheet. Click on the Settings toolbar button at the Startup screen for more information.   Continue reading

What’s Coming Up Next? Tomato Software Introducing Best Fonts 6 for macOS

Mac Best Fonts 6

YOKOHAMA (Señor Tomato) – It looks like the summer season is over. And it’s been unusually cool at the end of August here in the Tokyo-Yokohama metropolitan. It’s only 23°C this morning. Meanwhile, school will resume on Monday, I guess. So kids must be very unhappy about it.

Well, I have been insanely productive this month. So far, I have released 8 software products. That was a new record till several days go. What I mean is that I’m releasing the 9th software title of the month today. This new release is Best Fonts 6.

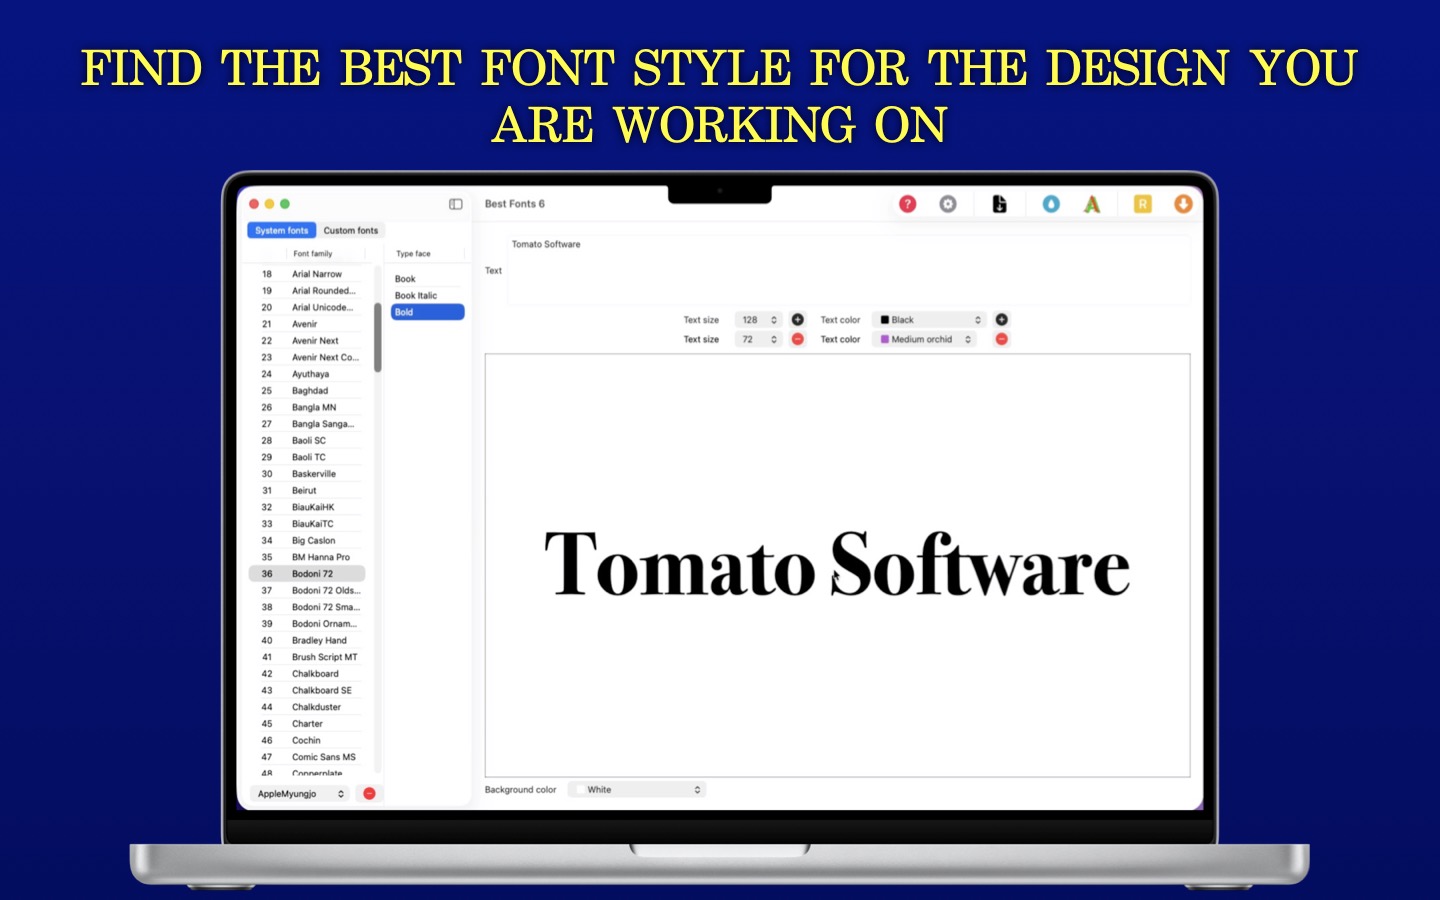
Once known as ‘FontsView,’ the Best Fonts is one of my oldest software series. It’s more than 15 years old. There was even a Windows version 15 years ago. Best Fonts 6 is the 6th installment of this series, which has its focus on the SwiftUI build and the undo/redo stack. Its main focus hasn’t changed since its first release, though. The core objective is to let the user compare different font families so that they can pick the best font style for a design you are working on.

Mac Best Fonts 6

Señor Tomato
  Mac Best Fonts 6

Señor Tomato

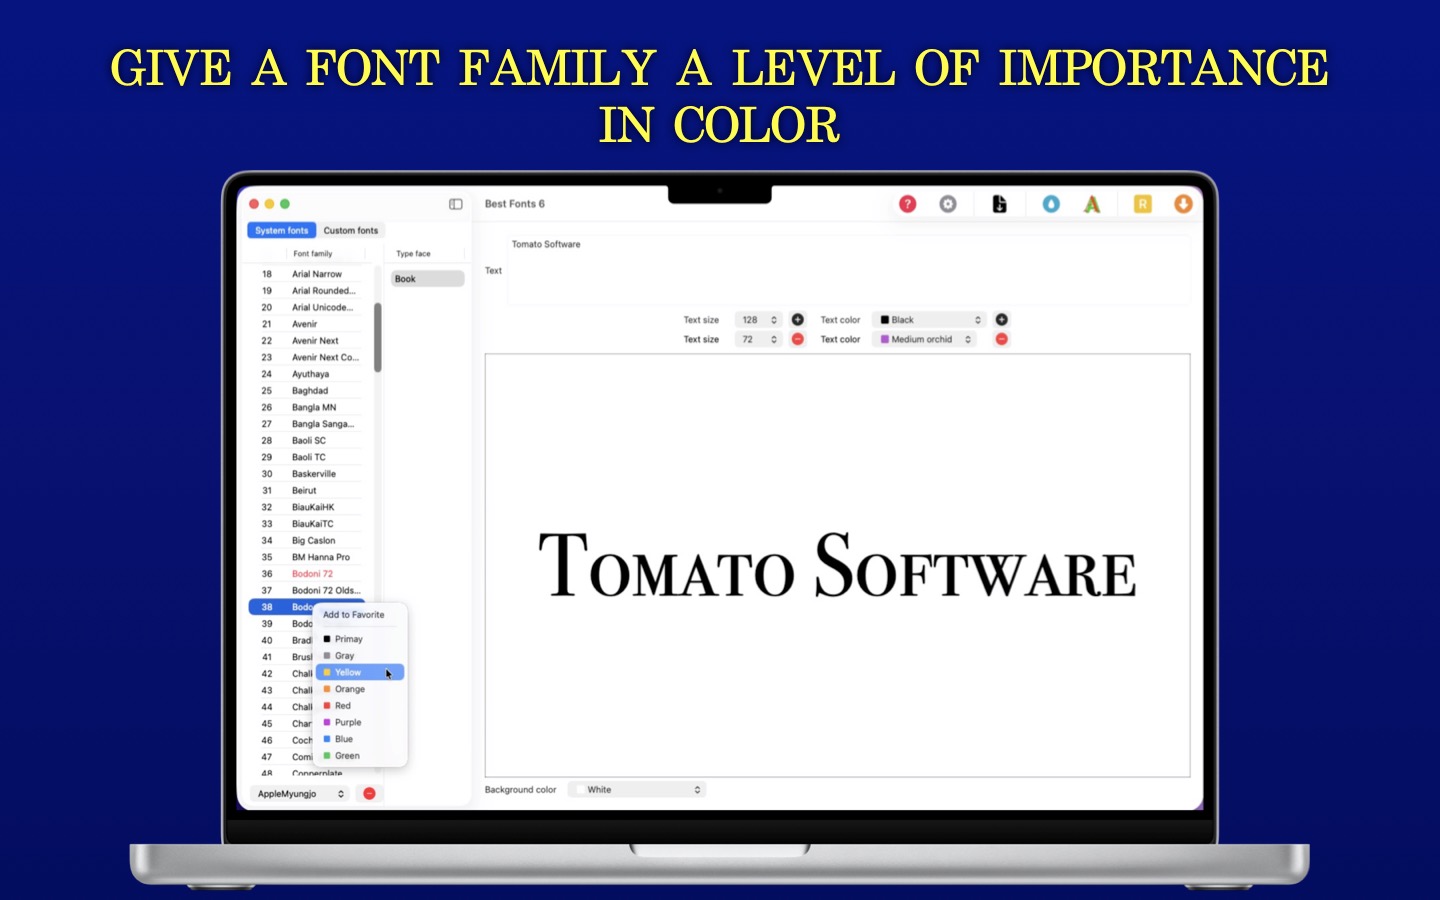
Best Fonts 6 shows two lists under its sidebar. System fonts refer to the fonts that are installed in the System through Font Book.app. And Best Fonts 6 lets you select its type faces (Regular, Italic, Bold…) to display styled text, given an input text string, a font size and a text color. Best Fonts 6 is also able to display styled text based on an font file that is not yet installed the System. In this case, the application has no access to the type faces of the selected custom font.

One of the major changes since the last release is support for the undo/redo stack. Whether you switch from one font family to another or change one font size to another, Best Fonts 6 has your back. You can press Command + z or Command + Shift + z to undo or redo changes.

Mac Best Fonts 6

Señor Tomato
  Mac Best Fonts 6

Señor Tomato

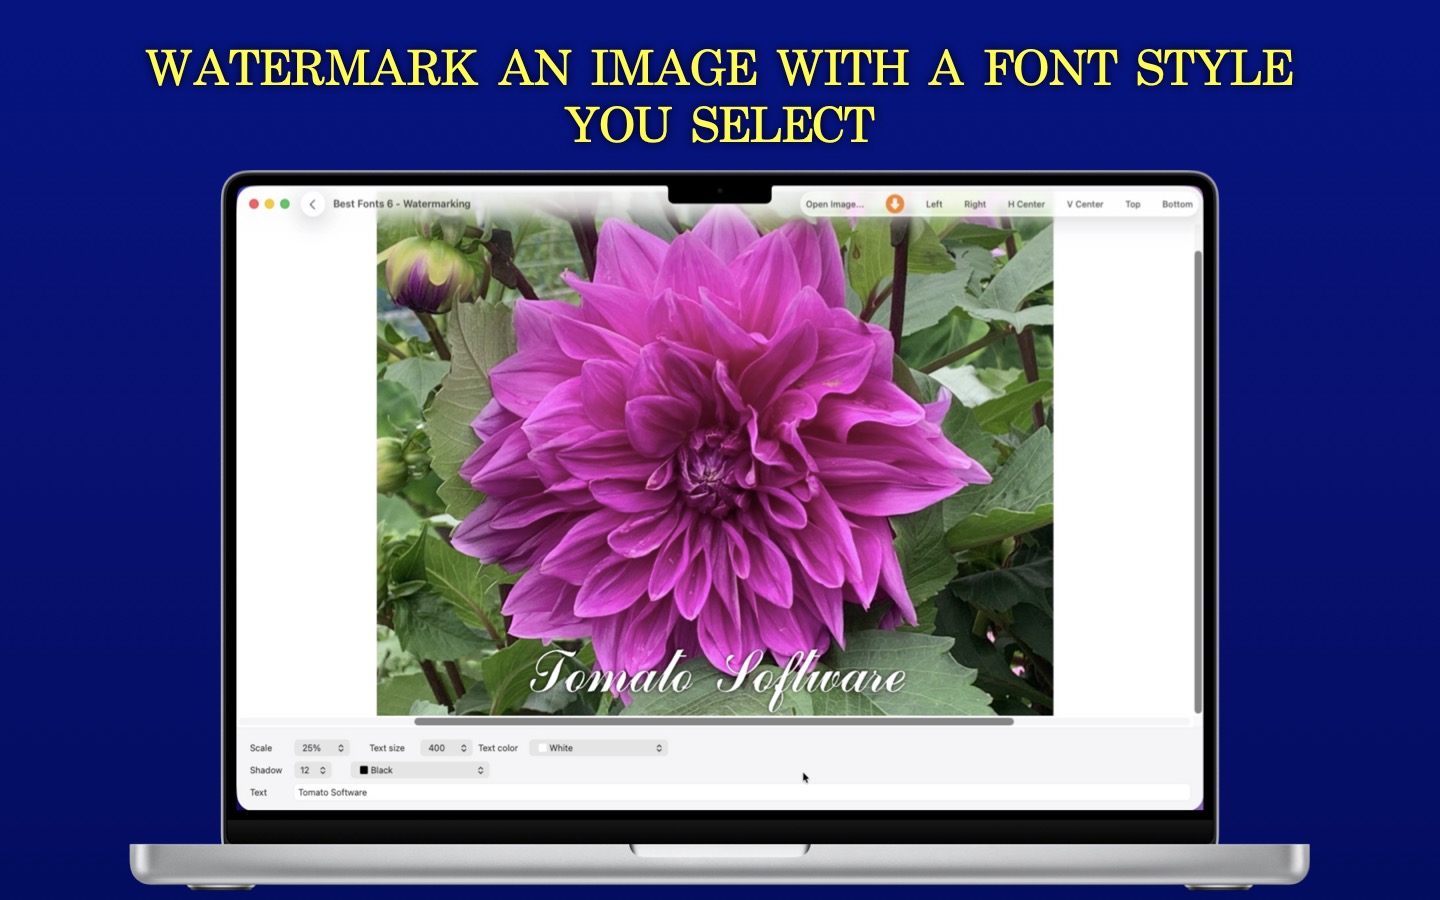
Best Fonts 6 has now an independent screen for watermaking an image with a font family you select. Select an image, and the application will show a text layer at the center. You can now move this text layer anywhere over the canvas. If it’s misplaced, you can undo the last position change.

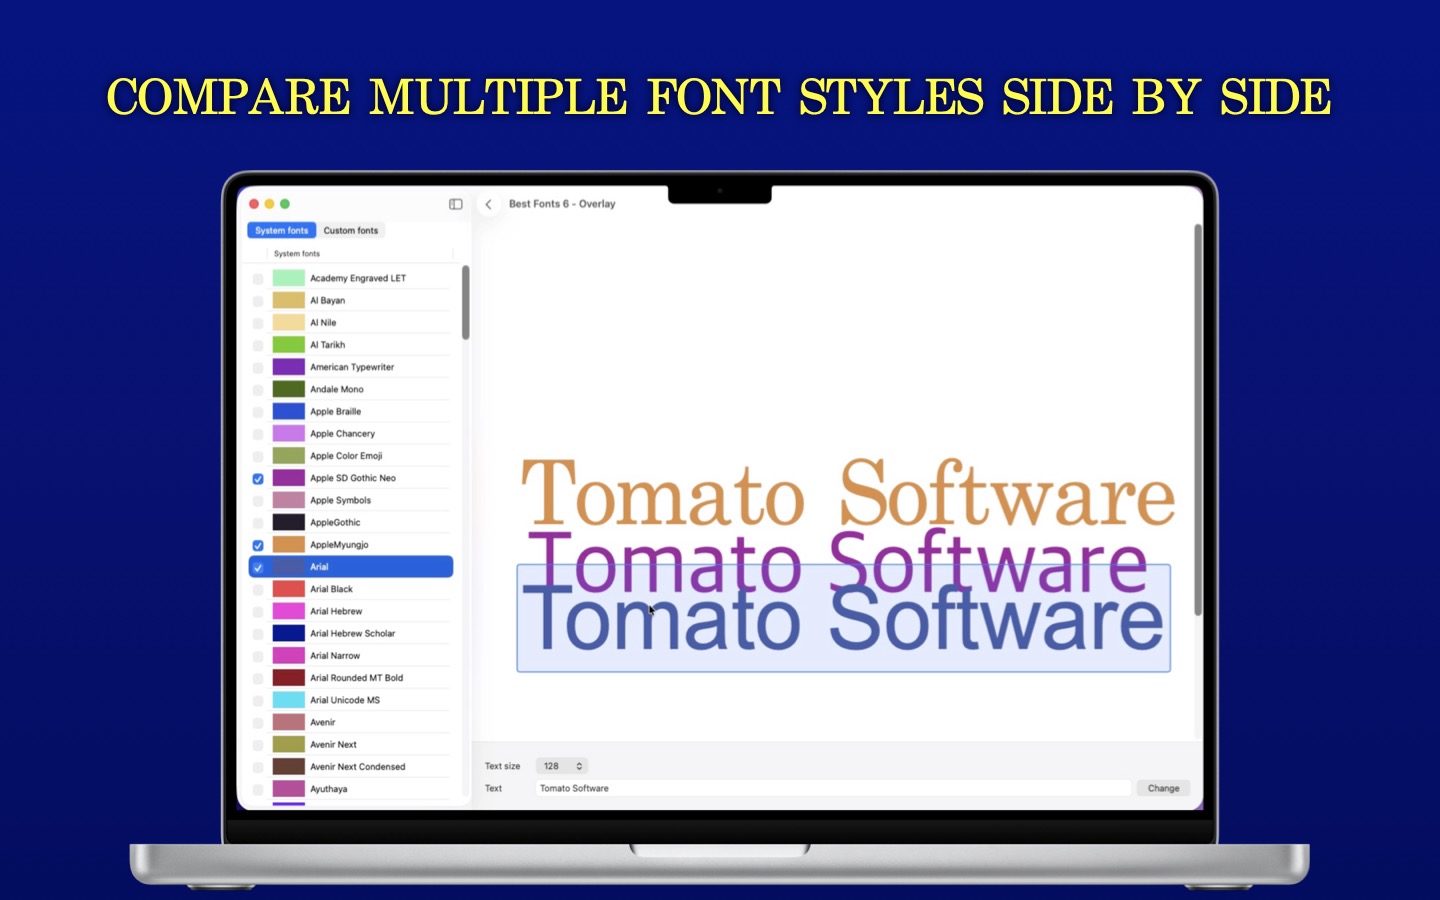
The previous version had the Overlay and Compare features separately. Now, they are put together into one as Overlay, where you can compare two or more style text layers side by side. You can move any of them with your mouse pointer. Again, if you misplace any of them, you can undo the last move.   Continue reading

What’s Coming Up Next? Tomato Software Introducing Notes2Me for macOS

Mac Notes2Me

YOKOHAMA (Señor Tomato) – The scorching heat is back. The highest temperature was 34° today. For some reason, I get very productive. Today, I have double releases. The first one to introduce is Notes2Me.

Notes2Me is a desktop application that lets you share messages with files between different devices (Mac, iPhone, iPad) with the same iCloud account of yours. Notes2Me works very well with its iOS counterpart (Notes2Me Mobile). As long as you are already logged into your iCloud account, there is no account setup or login.

Application’s main screen is divided into two parts. The Receiver side shows what you have received from other devices of yours. Under the right pane, you have a list of the records you have sent to other devices of yours.

When you send a record to your Mac from another device (Mac, iPhone, iPad), the application will not automatically fetch records. You can subscribe to record creation so that your Mac will receive a notification whenever you push a new record to the iCloud server.

In order to fetch records from iCloud, simply click on the Fetch toolbar button. And Notes2Me will only download unique records that don’t exist locally. With the click of a button, you can remove the original record the iCloud server. Similarly, you can remove all records in the iCloud server with the click of a button.

A record you have received from another Mac or an iOS device may contain one or more attachments. Regardless of the OS difference, you can save these attachments to your disk by opening the Files disclosure view and right-clicking on individual attachment names and selecting Save.   Continue reading